Legacy Content Warning
This section of our website is no longer maintained and may not be accurate or reflect our current ideology. Please report any content you believe to be inaccurate to [email protected].
Blog
Cloudflare Worker with Serverless Framework and Gitlab CI
Deploy a Cloudflare Worker with Serverless Framework and Gitlab CI Pipeline

Mitchell Musarra
Feb 06, 2019
Introduction
It’s no secret that I’m a huge fan of Cloudflare. One of the services I use quite a lot for clients is “Cloudflare Workers”. A Cloudflare Worker is essentially a JavaScript execution environment that can provide your application with auxiliary functionality in the form of a RESTful API endpoint.
For those already familiar with “serverless” paradigm, you can think of a Cloudflare Worker similar to a lambda function, however with the full backing and integration of Cloudflare’s content delivery network and web application firewall components. Deploying a Cloudflare Worker automatically propagates your script to each of their 165+ edge locations; ready to handle any incoming requests on a server closest to the client.
Of course, you can find some great official documentation on Cloudflare Workers here, but for those who like diving straight into a more practical use case, feel free to continue reading this article.
At the end of this guide we will have achieved the following:
- Create an extensible Cloudflare Worker that validates a provided email address string.
- Deploy Cloudflare Worker automatically using Serverless Framework.
- Set up a “testing” environment that can be staged prior to deploying to production with Gitlab CI pipeline.
1. Create Git Repository and Initialise Local Environment
Create a new repository on Gitlab with Gitlab CI enabled and clone to your local environment:
git clone <repository-url> .
cd <repository-name>
To get started with a base template, we will install the Serverless Framework and Cloudflare Worker plugin:
npm install serverless
npm install --save serverless-cloudflare-workers
serverless create --template cloudflare-workers

npm install
You should now have a scaffold in your local directory using the “cloudflare-workers” template.
Export the following environment variables so we can run the serverless command locally and verify things are working as they should:
export BASE_URL = https://your-domain/api* # must have "*"
export CLOUDFLARE_AUTH_EMAIL = [your auth email]
export CLOUDFLARE_AUTH_KEY = [your auth key]

# Set serverless debug flag
export SLS_DEBUG=*
Next, open “serverless.yml” and add in your CLOUDFLARE_ZONE_ID and CLOUDFLARE_ACCOUNT_ID under the “provider > config block”. This is just temporary – we will be using environment variables exclusively in the next section.
With these temporary variables set, let’s try and deploy the default function to a Cloudflare Worker. If there are any errors in your environment and/or configuration, now is the time to debug them.
# Deploy default function
serverless deploy

# Invoke the default function
serverless invoke --function helloWorld
2. Configure Serverless Framework
The Serverless Framework is defined by a .yml file consisting of “Services”. For our example, we have a single service called “Cloudflare Worker CI” that contains “provider”, “plugins” and “functions”.
Modify your serverless.yml file to look like the following:
service:
name: Cloudflare Worker CI (MJWebs Demo)

provider:
name: cloudflare
config:
accountId: ${env:CLOUDFLARE_ACCOUNT_ID}
zoneId: ${env:CLOUDFLARE_ZONE_ID}

plugins:
- serverless-cloudflare-workers

functions:
mjwebsDemo:
name: mjwebsDemo
script: mjwebsDemo
events:
- http:
url: ${env:BASE_URL}
method: GET
environment:
BASE_URL: ${env:BASE_URL}
To read more about the serverless.yml configuration options, check out the official Serverless Framework documentation here.
3. Create The Cloudflare Worker Script
The sendResponse function allows us to define a standard response JSON structure and pass in statusText (e.g. “success”), httpCode (e.g. 200) and a payload (e.g. “hello world”).
Within the handleRequest function, we conditionally separate different API functions by using the client requestURL.
In this example, if the client requestURL includes the string “/submitEmail” and passes the “validateEmail” test, we can then perform “dosomethingWithEmail” function. This could be adding the email to a mailing list.
See the example worker script below and save as “mjwebsDemo.js” (please improve this if you plan to use in production):
/**
* Cloudflare Worker CI (Demo Only)
* Author: Mitch Musarra
* URL: http://mjwebs.com.au/blog
*/
addEventListener('fetch', event => {
event.respondWith(handleRequest(event.request))
})
function validateEmail(email) {
// Use a regular expression to decide if an email is valid (true) or not (false)
var re = /^(([^<>()\[\]\\.,;:\s@"]+(\.[^<>()\[\]\\.,;:\s@"]+)*)|(".+"))@((\[[0-9]{1,3}\.[0-9]{1,3}\.[0-9]{1,3}\.[0-9]{1,3}\])|(([a-zA-Z\-0-9]+\.)+[a-zA-Z]{2,}))$/
return re.test(String(email).toLowerCase())
}
function doSomethingWithEmail(email) {
// you can perform some very special logic in this function
// we know the email is indeed valid
}
function sendResponse(statusText, httpCode, payload) {
return new Response('{"status" : "' + statusText + '", "data": "' + payload + '"}', {
status: httpCode,
headers: new Headers({
'Content-Type': 'application/json',
'Access-Control-Allow-Origin': '*' // change to desired cross-origin-policy domain
})
})
}
async function handleRequest(request) {
var requestURL = request.url // Get the requested url as a string
// We will use an IF/THEN block to separate our API functions (super basic URL router)
if (requestURL.includes('/mjwebs')) {
// This is just a test route, we can send a successful response
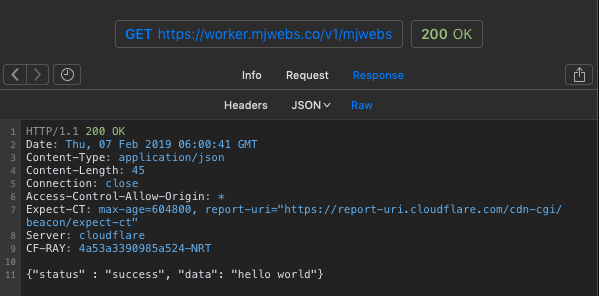
return sendResponse('success', 200, 'hello world')
} else if (requestURL.includes('/submitEmail')) {
// Create variable for the client url query string
let urlQuery = new URL(request.url).searchParams.get('email')
// Test if any input was actually provided
if (urlQuery === null) {
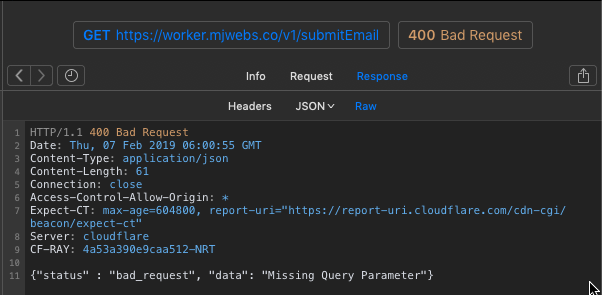
// Expected URL Query not found, send a bad_request response
return sendResponse('bad_request', 400, 'Missing Query Parameter')
} else {
// A query string was found
if (validateEmail(urlQuery)) {
// Great, the query string appears to be valid
doSomethingWithEmail(urlQuery) // Send to a function that will do something important with this data
return sendResponse('success', 200, urlQuery) // Send success response
} else {
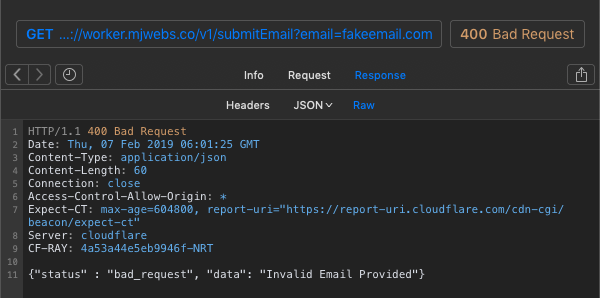
// Email does not appear to be valid; send bad_request response
return sendResponse('bad_request', 400, 'Invalid Email Provided')
}
}
} else {
// Simple "catch-all" for any URL not in our IF/THEN statements
return sendResponse('not_found', 404, 'Not found')
}
}
4. Setup Gitlab CI Pipeline
Never ever store API keys in your source code no matter how much easier it might be.
Prior to configuring our continuous integration pipeline, we need to securely store all our secret variables in our Gitlab repository to ensure our source code does not contain any credentials.
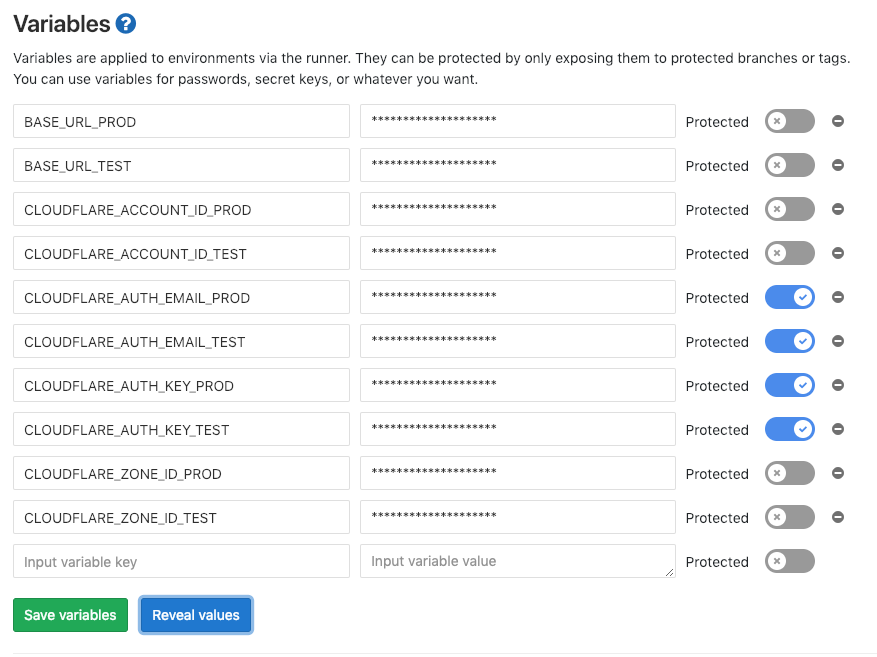
Below are the variables we need to provide to GitLab in order for our CI pipeline to work. You will see they are split up into “_TEST” and “_PROD” suffixes, allowing you to use completely separate Cloudflare zones if you desire.
# Production variables

BASE_URL_PROD # e.g. https://your-test-domain.com/api* (must have "*" at the end)
CLOUDFLARE_ACCOUNT_ID_PROD
CLOUDFLARE_AUTH_EMAIL_PROD
CLOUDFLARE_AUTH_KEY_PROD
CLOUDFLARE_ZONE_ID_PROD

# Testing variables

BASE_URL_TEST # e.g. https://your-prod-domain.com/api* (must have "*" at the end)
CLOUDFLARE_ACCOUNT_ID_TEST
CLOUDFLARE_AUTH_EMAIL_TEST
CLOUDFLARE_AUTH_KEY_TEST
CLOUDFLARE_ZONE_ID_TEST
If you prefer to keep things simple, you can use the same for both environments however with a different BASE_URL path, like below:
BASE_URL_TEST = https://api.mjwebs.co/test/v1*
BASE_URL_PROD = https://api.mjwebs.co/prod/v1*
In your GitLab repository, navigate to Settings > CI / CD and add in these variables after giving throught to your test/prod strategy.
After saving, your variables section will look something like this:
Next, create a file in your local directory called “.gitlab-ci.yml” and use the following contents to define the pipeline stages:
stages:
- testing
- production

before_script:
- npm install serverless
- npm install --save serverless-cloudflare-workers
- serverless --version
- npm install -D

Deploy-Testing:
stage: testing
script:
- export BASE_URL=$BASE_URL_TEST
- export CLOUDFLARE_AUTH_KEY=$CLOUDFLARE_AUTH_KEY_TEST
- export CLOUDFLARE_AUTH_EMAIL=$CLOUDFLARE_AUTH_EMAIL_TEST
- export CLOUDFLARE_ACCOUNT_ID=$CLOUDFLARE_ACCOUNT_ID_TEST
- export CLOUDFLARE_ZONE_ID=$CLOUDFLARE_ZONE_ID_TEST
- export SLS_DEBUG=*
- serverless deploy

Deploy-Production:
stage: production
when: manual
script:
- export BASE_URL=$BASE_URL_PROD
- export CLOUDFLARE_AUTH_KEY=$CLOUDFLARE_AUTH_KEY_PROD
- export CLOUDFLARE_AUTH_EMAIL=$CLOUDFLARE_AUTH_EMAIL_PROD
- export CLOUDFLARE_ACCOUNT_ID=$CLOUDFLARE_ACCOUNT_ID_PROD
- export CLOUDFLARE_ZONE_ID=$CLOUDFLARE_ZONE_ID_PROD
- serverless deploy
To see all the possible options for this file, check out Gitlab’s official documentation.
As you can see, there is a “testing” and “production” stage using the variables we created in the previous step to keep the two environments separate.
For the sake of our quick guide, we are going to skip unit testing. However, anything we push to the repository will be automatically deployed to the testing environment, where you can monitor the full deployment as the SLS_DEBUG environment variable is set.
5. Push to GitLab Repository
Let’s commit our local repository to the repository master branch:
git add .

git commit -m "mjwebs demo commit"

git push origin master
If everything has gone well, you should see your pipeline running like this:
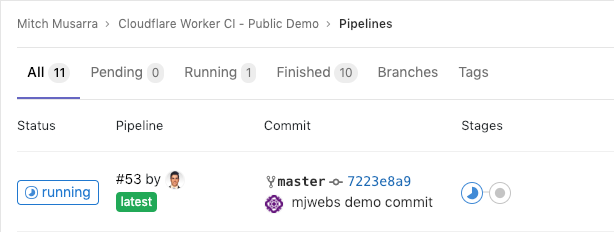
If your test stage fails, that’s okay – we set the SLS_DEBUG variable to enable a debug log. If you click on the stage, you will be able to find out why the script failed and adjust accordingly.
Programming is all about solving problems and learning from mistakes, and this is no exception (pun intended).
Testing the API
Open up your RESTful API client of choice. Ours is Paw, but you can just use a normal web browser since all our requests are GET.
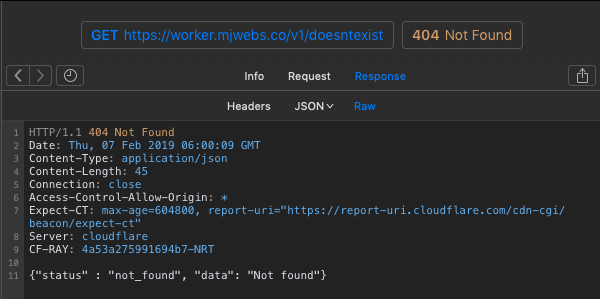
Test 404 error:
Test /mjwebs:
Test /submitEmail with no query string:
Test /submitEmail with invalid email address:
Test /submitEmail with valid email address:
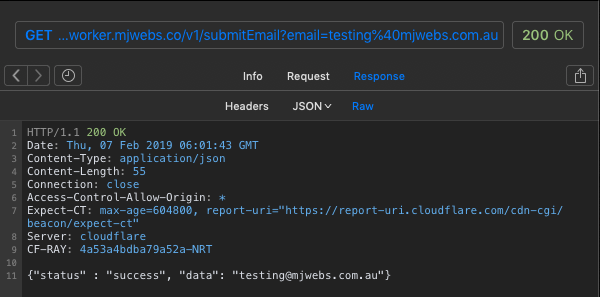
Great! So it seems to work fine! The Cloudflare Worker successfully validated that the provided email was valid.
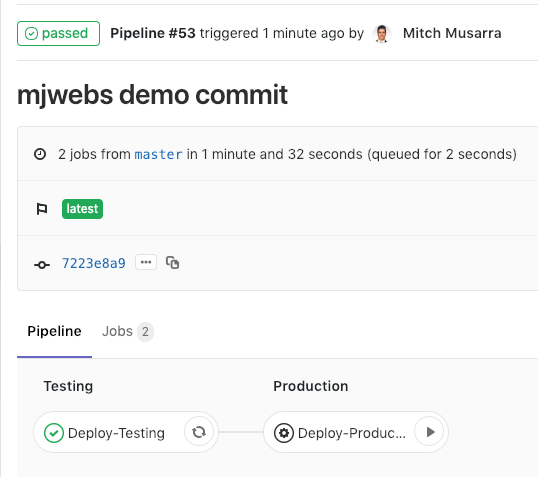
Deploy to Production
Now that we are happy with each function, let’s manually deploy to our production environment by clicking on the Deploy-Production stage in our Gitlab CI pipeline:
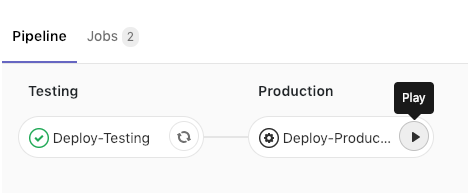
This will deploy the exact same script (which we know works) to our production environment, ready to be consumed by your application.
Conclusion
If you made it to this point, we have successfully created a continuous integration pipeline for our Cloudflare Worker using the Serverless Framework and Gitlab CI. We also have a testing and production environment to help you make changes and test them without affecting your live API endpoints.
If you are considering using this in real life, I highly recommend utilising a RESTful API testing framework such as Tavern as a separate Gitlab CI stage to programmatically verify everything is functioning properly prior to the “production” stage.
You can find the MJWebs public repository and the CI pipeline used in this article here.
Thanks for reading this guide – please comment below if you have any questions or have picked up any error. If you found this guide to be helpful, please share it!